m (1 revision) |
Latest revision as of 19:06, 24 October 2011
[edit] AWD Deployments (Service Groups) Page
This page shows the details of the selected Application (SAF Service Group). To properly understand this page it is best to understand the SAF entity hierarchy documented in the SAF AMF specification.
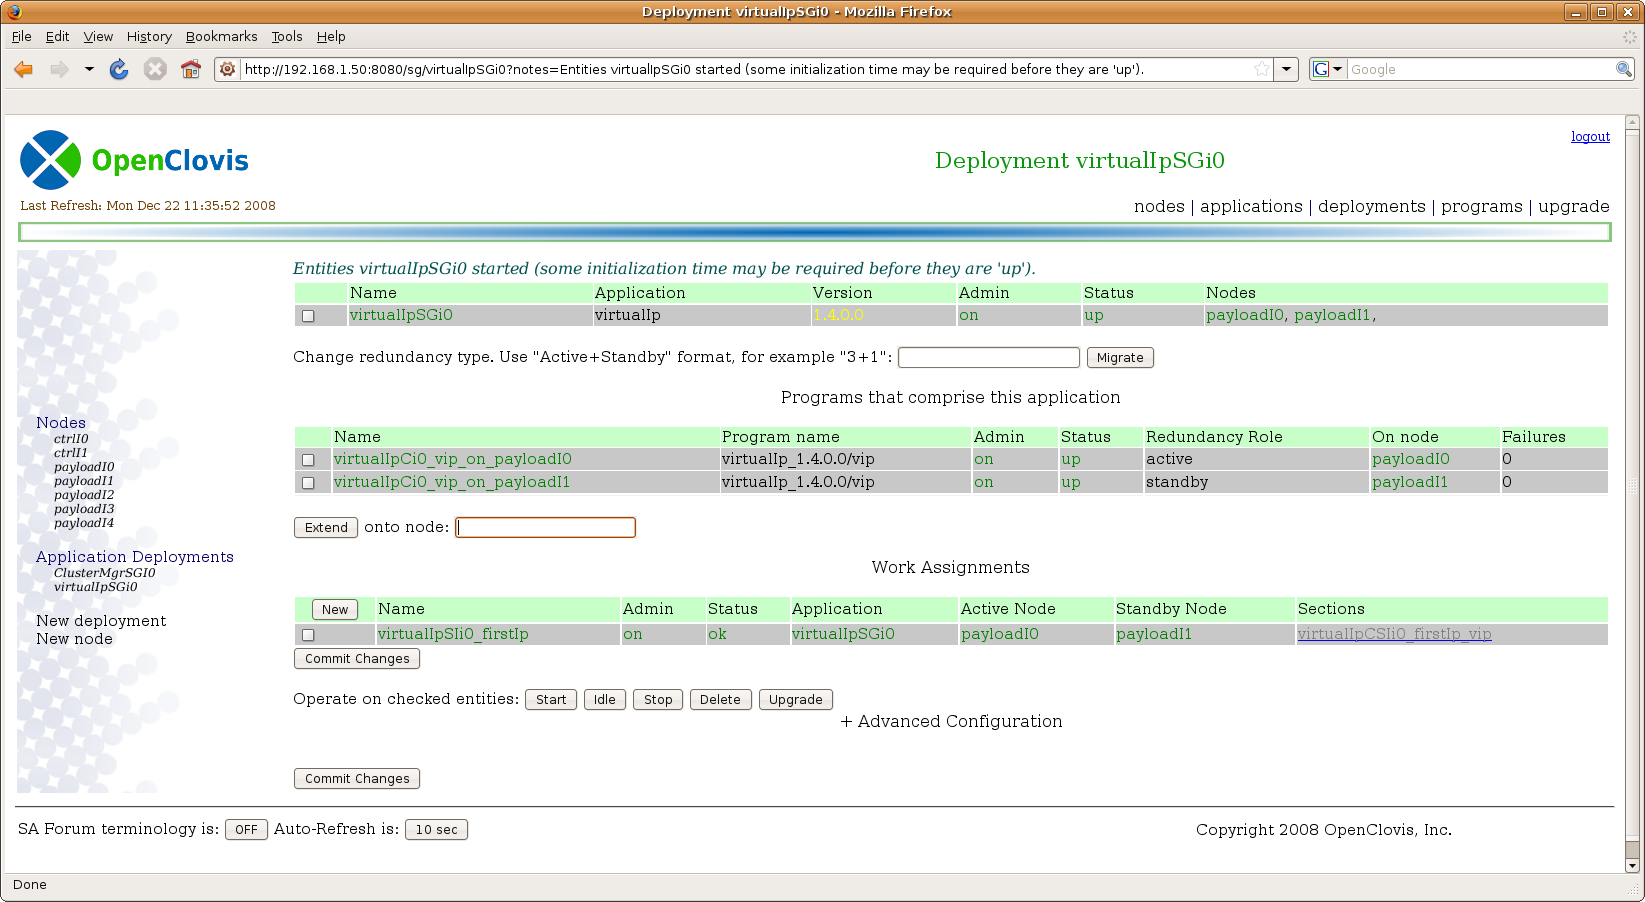
The top table describes the Service Group in detail. In this case the "Version" field is yellow, which indicates that a new version of this application is available in the bundle manager ( Applications page) and so this application can be upgraded.
The second table describes all the programs that make up this application. In this case, 2 programs are running on different nodes, in an active/standby relationship.
The third table describes all work assigned to this applications (SAF Service Instances). In this case there is just one work item called "virtualIpSIi0_firstIp". If you click on the name, you will be sent to the work details page, where you can modify the Name/Value pairs that define this work. You man also click the "New" button to create a new work item. Doing so will create a new row in the table. You can then fill in any relevant details. You may create as many new work items as desired. When finished, click the "Commit Changes" button to actually submit your changes to the SAFplus Platform Web Director.
As with all pages, you may select any table row by clicking the select box in that row and then click on a button to operate on the selected rows. In this page, you may start, stop, idle, or delete entities. If the deployment's version field is yellow, you may also upgrade the deployment by selecting the deployment (select the only row in the top table) and then clicking on the "Upgrade button". You may only upgrade at a deployment granularity, so selecting a component program or work item and then clicking upgrade will give an error.
You may also extend this deployment onto more nodes by typing the node name into the text box located near the "extend" button and then clicking on the button. For example, in this model, I could "extend" onto the node in slot 1 by typing "ctrlI0" into the box. You may also extend the deployment onto other nodes (or reduce it) by typing a new redundancy model designation into the "Change redundancy type" box and then clicking "Migrate". This is a very powerful one shot button, but it has some drawbacks; for example the system will automatically choose nodes to extend or delete. Of course, you can do the same functionality by hand by explicitly "extending" onto desired nodes (to add nodes) or by selecting rows and clicking "delete" (to remove them).
Of course, to successfully use the extend or migrate functionality, you must install the software to the appropriate nodes yourself. This can be done via the Applications (SAF Software Bundles) Page . If you forget to do so, the extend or migrate will work, but you will not be able to actually start the software on that node (until you install it)!
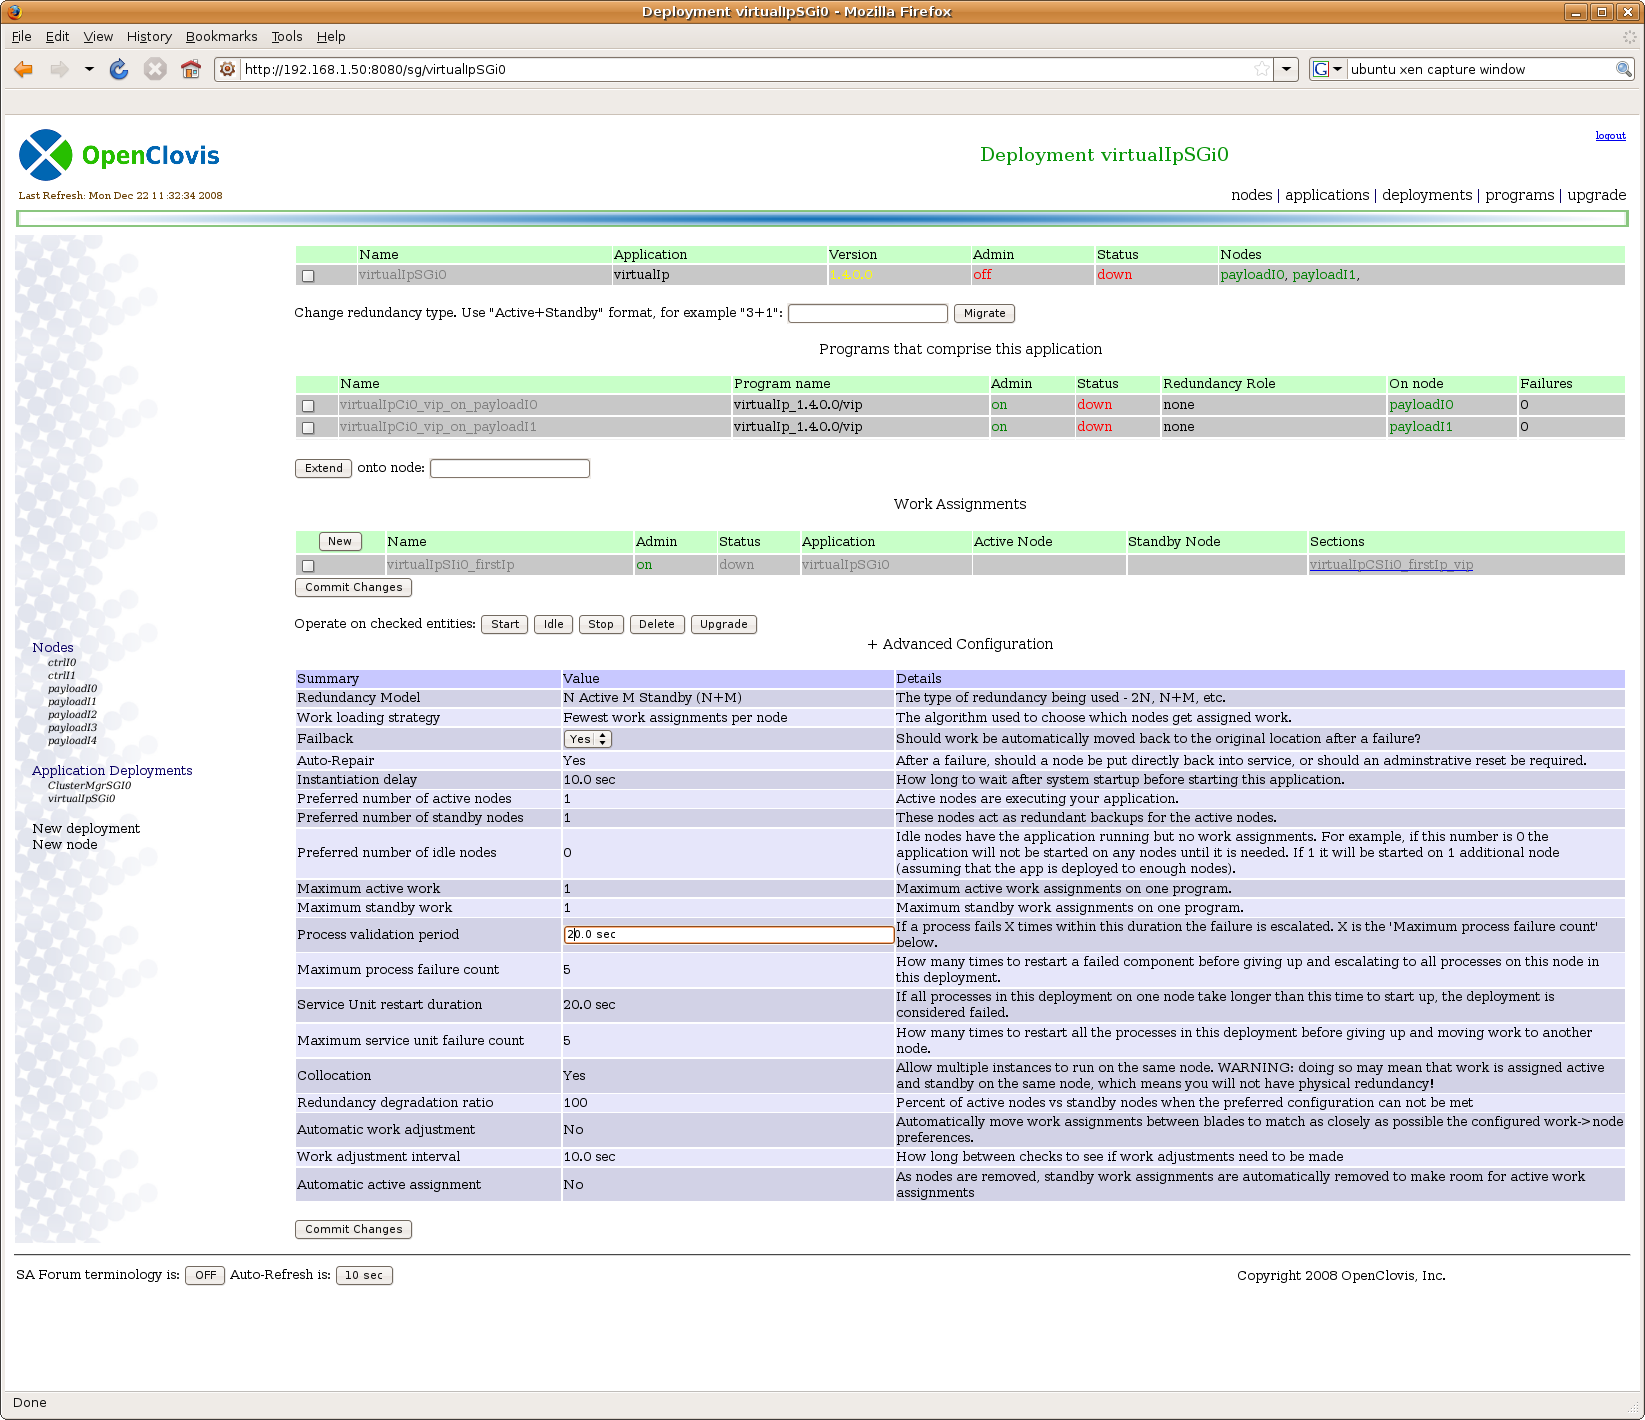
Advanced Configuration can be accessed by clicking on the "+ Advanced Configuration" title. Once opened, the advanced configuration looks like:
Documentation for each field is beyond the scope of this document. It exists on the page itself, in the SAF AMF spec, and within the OpenClovis documentation.
You may change any field by clicking on it (it will dynamically create a edit box), making the change, and then (when all desired fields are changed) clicking the "Commit Changes" button.


